
Even the right gasket can fail when the joint is not assembled correctly. From flange preparation and gasket handling to bolt lubrication, tightening sequence, torque control, and re-torque timing, installation fundamentals play a major role in reducing leaks and improving long-term reliability.
Whether you work in maintenance, reliability, operations, or field service, this issue is designed to help your team apply practical best practices directly in the field.
Warm regards,
Sylvia Flegg, Global Marketing Manager
Rhea Lisondra, Digital Marketing Coordinator
Why Installation Matters
A bolted flange joint assembly is a system. The gasket, flanges, bolts, nuts, washers, lubrication, and installation method all work together to create and maintain a seal.
Many common gasket failures are not caused by the gasket alone. Our Durlon installation training material lists causes such as uneven flange loading, low gasket load, low bolt strength, torque loss, vibration, thermal cycling, water hammer, elastic interaction during tightening, and improper installation practice. Download today!
Gasket Fundamentals & Installation Training e-book
Bolted Joint Diagram
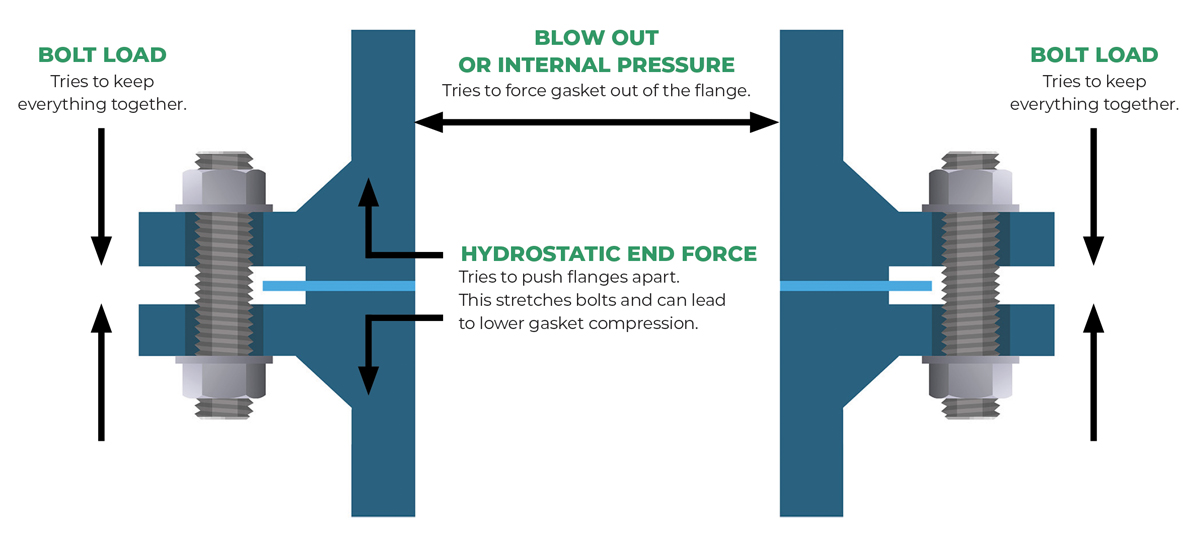
The Basics of a Reliable Installation
Before any gasket is installed, the joint should be safe, clean, inspected, and ready for assembly.
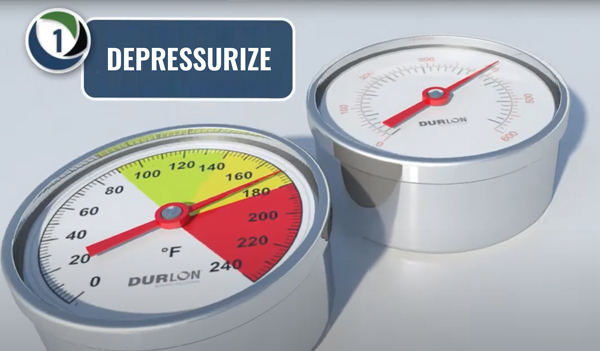
Depressurize and Make the System Safe. Before disassembly or installation, confirm the system is at ambient temperature, depressurized, and de-energized. We recommend following plant lock-out/tag-out procedures before opening a bolted flange joint assembly.
Never assume a joint is safe to open. Confirm pressure, temperature, stored energy, and liquid head have been addressed according to site procedures.
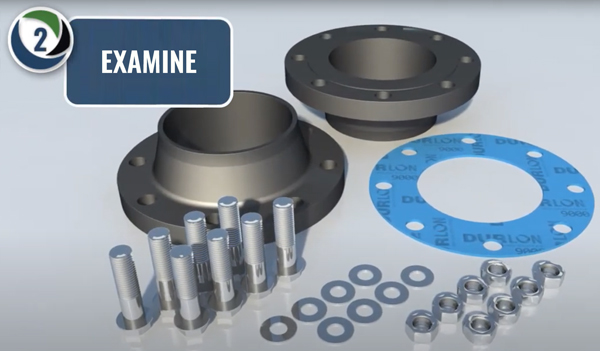
Flange Preparation and Inspection. A gasket can only seal against the surface it is installed on. Damaged, dirty, misaligned, or uneven flange faces can create leak paths before the gasket is even compressed.
Before installing the gasket:
• Visually examine and clean the flange faces
• Inspect bolts, nuts, and washers
• Replace damaged or defective components
• Confirm flange alignment and parallelism
• Verify the flange surface finish is suitable for the gasket style
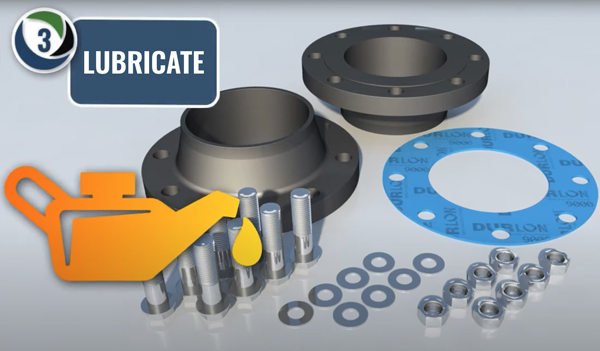
Lubrication: Small Step, Big Impact. Lubrication is one of the most overlooked installation steps, but it has a major effect on bolt load.
Lubricant should be applied to bolt threads, nut threads, nut facing, and washers. Friction works against the installer and can reduce the actual load achieved at a given torque.
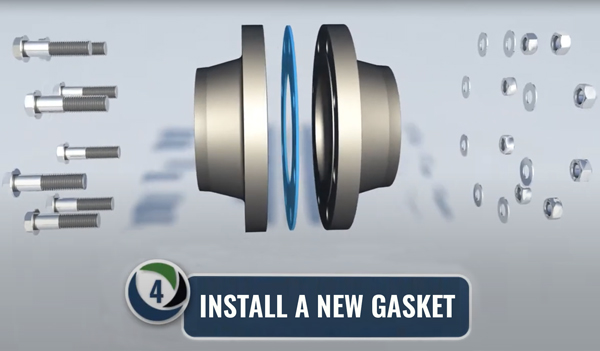
Gasket Handling and Placement. A gasket should be handled carefully and installed correctly the first time.
Best Practices:
• Use a new gasket
• Do not reuse old gaskets
• Do not stack multiple gaskets
• Keep the gasket clean and dry
• Center the gasket properly between the flanges
• Avoid bending, creasing, or damaging the gasket during placement

Bolt Tightening Sequence. A gasket must be compressed gradually and evenly. Tightening one bolt fully before the others can create uneven compression, flange rotation, gasket damage, or leak paths.
• Hand tighten all nuts
• Tighten using a cross-pattern sequence
• Apply torque in multiple passes:
Round 1: 30% of target torque
Round 2: 60% of target torque
Round 3: 100% of target torque
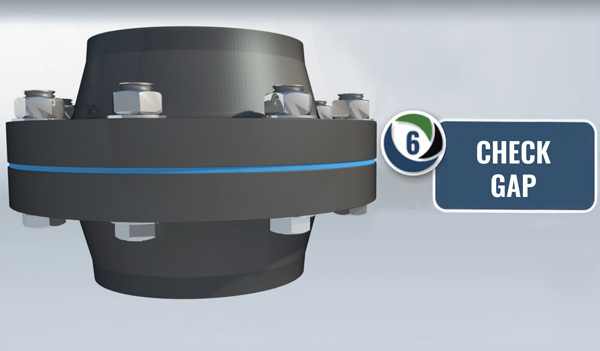
Torque Best Practices. It is recommened that Gap checks between rounds and selective bolt tightening if the gap is not reasonably uniform. Then continue with a clockwise rotational round at 100% torque until no further nut rotation occurs, followed by re-torque after 4–24 hours at ambient temperature where possible.
Common Installation Mistakes That Lead to Leaks
Over-tightening
Over-tightening can reduce gasket contact area, crush the gasket toward the outside diameter, damage the flanges, and lead to leakage. The Gasket Fundamentals & Installation Training e-book describes flange rotation as a common over-tightening issue on certain Class 150 flanges.
Under-tightening
Under-tightening can allow fluid to penetrate the gasket ID, degrade the gasket, and lead to leakage or blowout. The e-book notes that all gaskets have some porosity and require adequate load to achieve a proper seal.
Uneven tightening
Uneven compression can create localized high-stress and low-stress areas. The result may be gasket damage in one area and insufficient sealing stress in another.
Skipping re-torque
Torque loss is inherent in bolted joints. Bolt relaxation, gasket creep, vibration, thermal expansion, and elastic interaction all contribute to torque loss, with the first 4–24 hours being critical.
Gasket Installation Checklist
Before installation:
- Confirm system is depressurized, de-energized, and at safe temperature
- Clean and inspect flange faces
- Inspect bolts, nuts, and washers
- Replace damaged components
- Confirm correct gasket material and size
- Confirm gasket is new and undamaged
- Verify correct torque values and tool calibration
- Lubricate bolt threads, nut threads, nut facing, and washers
- Align gasket properly
- Tighten in cross-pattern sequence
- Use 30%, 60%, and 100% torque passes
- Check flange gap between rounds
- Complete rotational round at 100%
- Re-torque after 4–24 hours at ambient temperature where possible
- Record installer, date, lubricant, flange finish, and final torque
Watch our Step-by-Step Gasket Installation Video

Talk to a Sealing Expert
Installation errors can create repeat leaks, unplanned downtime, rework, and safety concerns. If your team is dealing with recurring flange leaks or uncertain torque requirements, we can help review gasket selection, flange condition, fastener assumptions, and installation procedures.
Talk to a Gasket Specialist | Request a Quote
Tune in for our next issue as we cover the topic:
“Steam Service Sealing: Preventing Leaks in High-Temperature Systems” as we focus on gasket selection and installation in steam lines, condensate systems, heat exchangers, and power/plant utility applications where heat cycling can challenge seal integrity.
Check for our most up-to-date Durlon Gasket Manual and enjoy our monthly Blogs. See you in August!